Clippa includes a One-Click Demo Import feature that allows you to quickly replicate the demo website on your installation. This is the fastest way to get started and explore how the theme works.
⚠ Important: Make sure you have installed and activated all required plugins before importing the demo content.
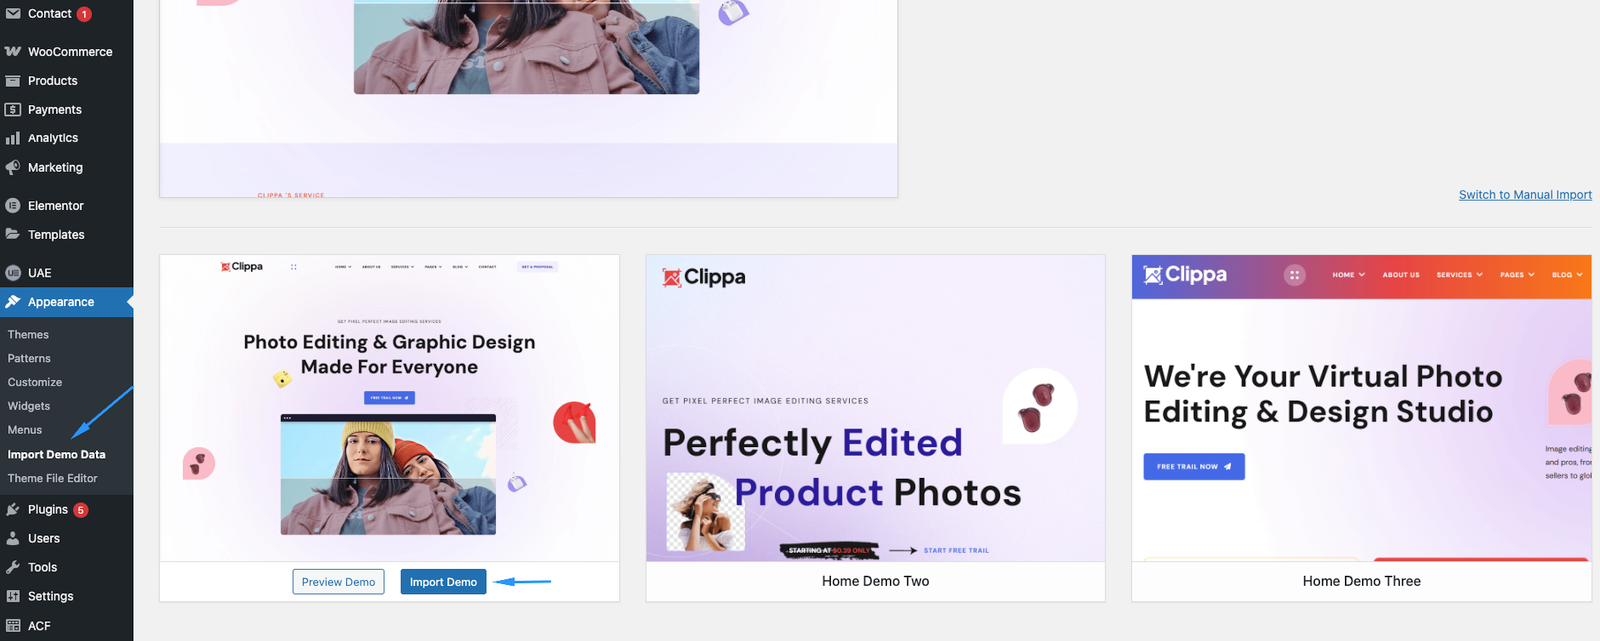
One-Click Demo Import (Recommended)
- Go to your WordPress Dashboard.
- Navigate to:
Appearance → Import Demo Data - Click the Import Demo Data button.
- The import process may take a few minutes depending on your server speed. Please do not refresh or close your browser during the import.
- Once complete, your website will look similar to the demo.
Manual Import (Optional – Advanced Users)
If the One-Click Import doesn’t work due to server limitations, you can import demo content manually.
- Go to:
Tools → Import → WordPress - If the WordPress Importer is not installed, click Install Now, then activate the importer.
- Choose the demo content
.xmlfile included in your full theme package (located in the “clippa/lib/demo-content” folder). - Assign authors and choose whether to import attachments.
- Complete the import process.
Common Issues & Solutions
- Import fails or times out:
This is usually due to low server resource limits. Make sure your PHP configuration limits match the recommended values mentioned in the Requirements section. - Images not imported:
In some cases, images may not fully import due to hosting restrictions. You can manually replace the images from your Media Library or page builder settings. - Duplicated content:
If you run the demo import multiple times, content may be duplicated. It is recommended to reset your WordPress installation before re-importing.
✅ Next Step: After demo import, you can start customizing your site via the Theme Options Panel and Customizer.